Fusion Methods
The process of joining PPR-C pipes and fittings is very simple and results and inseparable watertight joints. It is carried out using a simple welding machine that fuses the internal surface of the fitting and the external surface of the pipe, so that the material of the pipe and the fitting will be bonded together.
THE FOLLOWING DESCRIBE THE STEPS OF THE WELDING PROCESS
Prepare the welding machine by fitting it with the welding dies of the diameters to be welded. Connect the plug to the 220V power supply socket and wait until the green light on the machine goes out indicating the welding machine has reached the working temperature.
Cut the pipe at right angles to the pipe axis using suitable pipe cutter.
• Remove any burrs or cutting chips by deburring the cutting area.
• Mark the welding depth on the pipe using suitable marker.
• Insert the end of the pipe without turning into the heating sleeve up to the marked welding depth and at the same time slide the fitting without turning into the other side of the heating tool up to the stop. It is essential to observe the mentioned heating times (refer to the below table)
• Leave the pipe and fitting into the heating tool until the heating time is elapsed.
• At the end of the heating time, remove the pipe and fitting from the heating tool and push them immediately against each other up to the mark indicating the welding depth. At this stage the depth mark will be covered with the welding bead.
• During this process, do not rotate the pipe and fitting relative to each other.
• Allow the joint to cool fully before using.


HOLE REPAIRING
If a hole is accidentally made in the pipe (with a drill bit or screws) and if the hole is in only one side of the pipe, it can be repaired using the hole repairing die, bearing in mind that the pipe size must be compatible with the die diameter.
THE REPAIR PROCEDURE IS AS FOLLOWS:
• Clean and dry the part to be repaired.
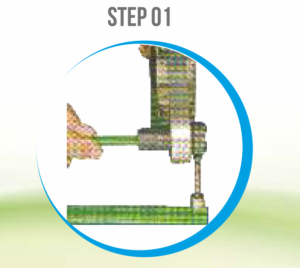
• Fit the male part of the Hole repairing die into the hole; it must melt the surface to be adjusted by the operator to suit the pipe thickness, to ensure that the die cannot be inserted too far and melt the other side of the pipe. To make this adjustment, undo the screw which fixes the bush and then move it along the die.
• At same time as the male part of the die melts the area around the hole, the female part melts the repair bar usually supplied with die. Once the heating time has passed (5sec.) the repair bar must be inserted in the hole. When this operation is complete, wait for everything to cool and then cut of the excess part of the repair bar.
• If the diameter of the hole to be repaired is greater that of the die, or both sides of the pipe are punctured, the piece of pipe must be cut out and the repair made using normal pipe fittings.


